Best Practices for Positioning Commercial Cameras During Installation
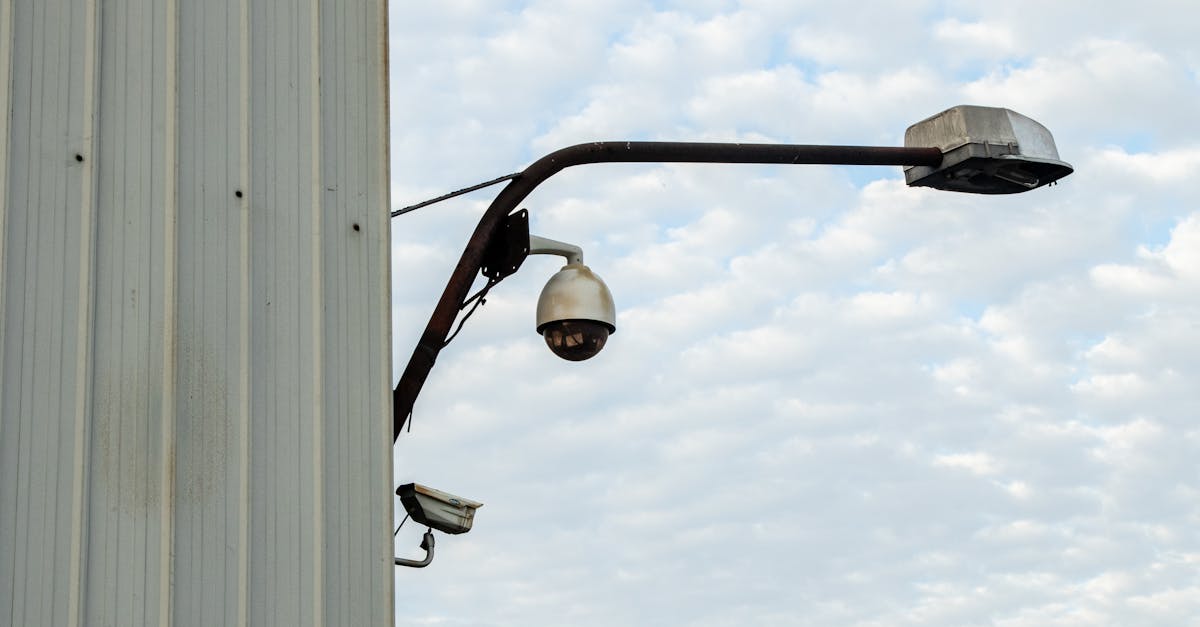
Table Of Contents
Integrating Lighting Solutions for Enhanced Performance
Effective lighting is crucial for the performance of commercial cameras, especially in challenging environments. Proper illumination boosts image quality, ensuring clarity and detail in both day and night conditions. Strategically placed lighting fixtures can assist in reducing shadows and minimising blind spots, providing a more comprehensive view of the monitored area. The use of LED lights is preferable due to their energy efficiency and longevity, which can enhance overall surveillance operations.
Integrating lighting solutions can also help in managing specific surveillance needs, such as monitoring entry points or high-traffic areas. Considering aspects like light temperature and intensity is important, as these factors can significantly affect how cameras perceive colours and movements. Additionally, motion-sensitive lighting can be implemented to activate automatically when movement is detected, thereby contributing to overall security while conserving energy.
Best Practices for Night Vision and Low Light Conditions
In low light environments, the effectiveness of commercial cameras largely depends on their night vision capabilities. Selecting cameras equipped with infrared (IR) technology can significantly enhance visibility after sunset or in dark areas. These cameras capture images using IR light emitted from built-in LEDs. It is vital to position these cameras strategically, ensuring the coverage area is within the effective range of the infrared illumination.
Additionally, using external lighting solutions can provide benefits beyond what IR technology can achieve alone. The integration of ambient lighting extends the functionality of the cameras, allowing for clearer and more detailed footage. When installing such systems, it's essential to minimise shadows and eliminate potential obstructions in the camera's field of vision. This approach optimises performance during nighttime surveillance and ensures reliable monitoring in low light conditions.
Evaluating Camera Field of View
Choosing the right field of view (FOV) is crucial for effective surveillance. A wider FOV can capture large areas, making it suitable for monitoring expansive spaces such as parking lots or retail environments. However, this advantage may come at the cost of detail, as objects in the periphery may appear smaller. Conversely, a narrower FOV allows for closer observation of specific targets, which is beneficial in settings requiring identification and detail, such as entrances or cash registers.
When evaluating camera placement, consider the specific surveillance needs of the area. The intended purpose will influence the ideal field of view. For instance, a camera aimed to monitor an entry point may benefit from a narrow FOV to focus on individuals approaching the door. In contrast, cameras deployed for perimeter security might need a wider angle to encompass the entire boundary. Always ensure the chosen FOV aligns with the anticipated risks and the overall surveillance strategy.
Selecting Lenses for Specific Surveillance Needs
The choice of lens is pivotal when configuring a surveillance system. Different environments and objectives may require various focal lengths and lens types to capture the desired field of view and detail. Wide-angle lenses are beneficial for monitoring expansive areas like car parks or retail spaces, while telephoto lenses provide a closer view for applications such as perimeter security or face recognition. Lens apertures also play a critical role; larger apertures allow more light, enhancing performance in low-light conditions.
In addition to focal length, consider the environment where the camera will be situated. Vandal-resistant lenses can be invaluable in high-risk locations, protecting against tampering and damage. Furthermore, specific features like IR capability can enhance night vision capabilities, making it essential to match the lens characteristics to the intended surveillance needs. Engaging with professionals knowledgeable about lens options can help ensure the right choice tailored to specific scenarios.
Ensuring Secure Mounting of Cameras
A sturdy and reliable mounting system is essential for maintaining the integrity of commercial cameras. Selecting appropriate mounting hardware based on the camera's weight and intended location can significantly reduce the risk of damages. For outdoor installations, weatherproof mounts not only provide sturdiness but also protect against environmental factors such as wind and rain. Using mounts with adjustable angles allows for optimal camera positioning, ensuring that the surveillance area is covered effectively.
Utilising tamper-resistant screws and bolts is critical for enhancing security. These types of fasteners typically require specialised tools for removal, deterring potential vandalism. In high-risk environments, additional measures such as protective housings can further shield the cameras from physical harm. Regular inspections of the mounts are advisable to identify any signs of wear or loosening, which can compromise the camera's stability and effectiveness over time.
Methods for Preventing Tampering and Vandalism
Using tamper-resistant hardware is an effective way to secure cameras and deter vandals. Install screws and mounts that require specialised tools for removal. This simple measure can significantly reduce the risk of theft or damage. Additionally, tamper alerts integrated into the camera system provide real-time notifications of any attempted interference. This feature allows for immediate action to be taken, increasing the overall security of the surveillance area.
Positioning cameras in high, hard-to-reach locations further enhances their protection. While ensuring that these locations still provide optimal field coverage is essential, installing cameras above head height can make access more difficult for potential vandals. Utilising outdoor housing with weatherproof and impact-resistant features adds another layer of security. Such enclosures not only protect the cameras from environmental factors but also from physical attacks, strengthening the overall resilience of the surveillance setup.
FAQS
What are the best practices for determining the optimal placement of commercial cameras?
The best practices include assessing the area’s layout, considering lighting conditions, evaluating the field of view, and ensuring secure mounting to prevent tampering.
How can I improve night vision and low light performance for my cameras?
Integrating appropriate lighting solutions, using cameras equipped with infrared capabilities, and positioning them to avoid glare can significantly enhance night vision and low light performance.
Why is evaluating the camera field of view important?
Evaluating the field of view is crucial as it helps in determining the coverage area of the camera, ensuring that critical zones are monitored effectively without blind spots.
What should I consider when selecting lenses for surveillance cameras?
When selecting lenses, consider the specific surveillance needs, such as the distance from which the camera will capture images, the desired level of detail, and the overall field of view required for the area being monitored.
How can I secure cameras to prevent tampering and vandalism?
Secure mounting methods, such as using tamper-proof screws, selecting inconspicuous locations, and employing protective casings or housing, can help effectively prevent tampering and vandalism.
Related Links
Streamlining the Installation Process for Multi-Site Camera SystemsKey Considerations for Installing Cameras in Large Facilities
How to Prepare a Site for Effective Camera Installation
Safety Protocols for Commercial Camera Installation Projects
Tips for Seamless Integration of Commercial Camera Systems
Common Pitfalls to Avoid During Commercial Camera Installations